SUMMARY
- Create your team and clear zone stages/boss
- Get rewards when clearing stages (can refresh stages multiple times)
- Exchange coins for rewards
- Credits to J. / Blue / Gademan / Rifter for certain info
- THIS GUIDE WAS WRITTEN AT SEASON 1. DO NOTE THAT AS SEASON CHANGES, THINGS WILL CHANGE LIKE THE REWARDS, AND RECRUITMENT POOL AS WE CAN GET NEWER SSR+. ALSO THE PVE ENEMIES WILL UPDATE TO BECOME HARDER (EG HAVE SPECIALIZED PROTECTION). SO THE META AND LINE-UPS WILL CHANGE WITH EACH SEASON (which I will not update here, just pick the good stuff!)
NOTE: Apparently the rewards change, as Season2 Zone A now have 1 SAC instead of 3, so always check the rewards before following the guide. For Season2 it is NOT worth to reset Zone A anymore.
INTRODUCTION
This is probably one of the most fun you can have in OPM at the moment. It’s fun because you can create and experiment with different lineups, even with units that you don’t have since you select them from the draft – and this includes many SSR+ even! Hence it is a mode where F2Ps can experience the fun without spending anything. And not only that, you still get great rewards!
TIMELINE
- Lasts 17 days, after which it will start again (unsure if there’s a break)
- Currently it seems to be an ‘event’, but from the dev’s FB post, it seems that there are Seasons and they made clear it’s a new gameplay mode. So I assume it should be a recurring event (like HBU) on a monthly basis.
GAMEPLAY
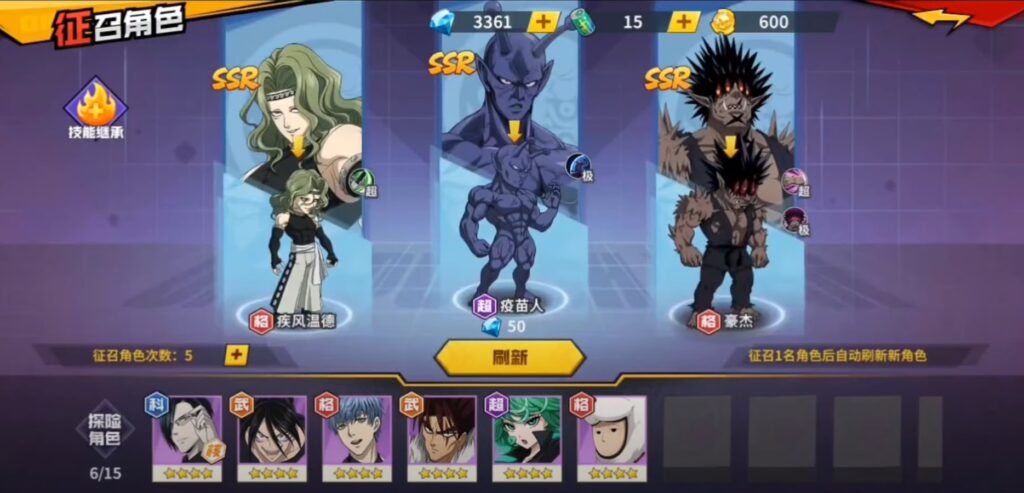
- Create your team by selecting from the random draft, similar to Core Trials.
- Do note that the units will inherit certain skills you already have, such as Ultra-Ultimates (via KS), Extreme Passive, P5, and SSR+ Awaken 2/3.
- At the start you will only have 1 slot open, and it slowly opens up more slots as you progress
- Even though you may have 1 or 2 slots etc, you are free to rearrange the positions, eg you can put 1 behind 1 in front, etc.
- Speed order is based on position similar to Core Trials (with the exception of high speed units that may move first like Sonic or Flash etc)
- It is advised to choose at least one core unit whenever you get the choice, otherwise when more slots start to open later on, you might struggle if you don’t have a core unit.
- You may pay 50 gems to refresh the draft, and 100gems for recruitment chance
- Free recruit chances are available after clearing following stages of each zone:
- Floor 2: 1x
- Floor 4: 1x
- Floor 9: 1x
- Floor 10: 2x
- Floor 12: 1x
- Floor 14: 1x
- Floor 19: 1x
- Floor 20: 2x
- Floor 22: 1x
- Floor 24: 1x
- Floor 29: 1x
- Floor 30: 2x
- If you already got your good PVE units, can consider to save up the recruitment chances
- If you are struggling, can consider refreshing chances (50gems) and try to +3 your PVE units
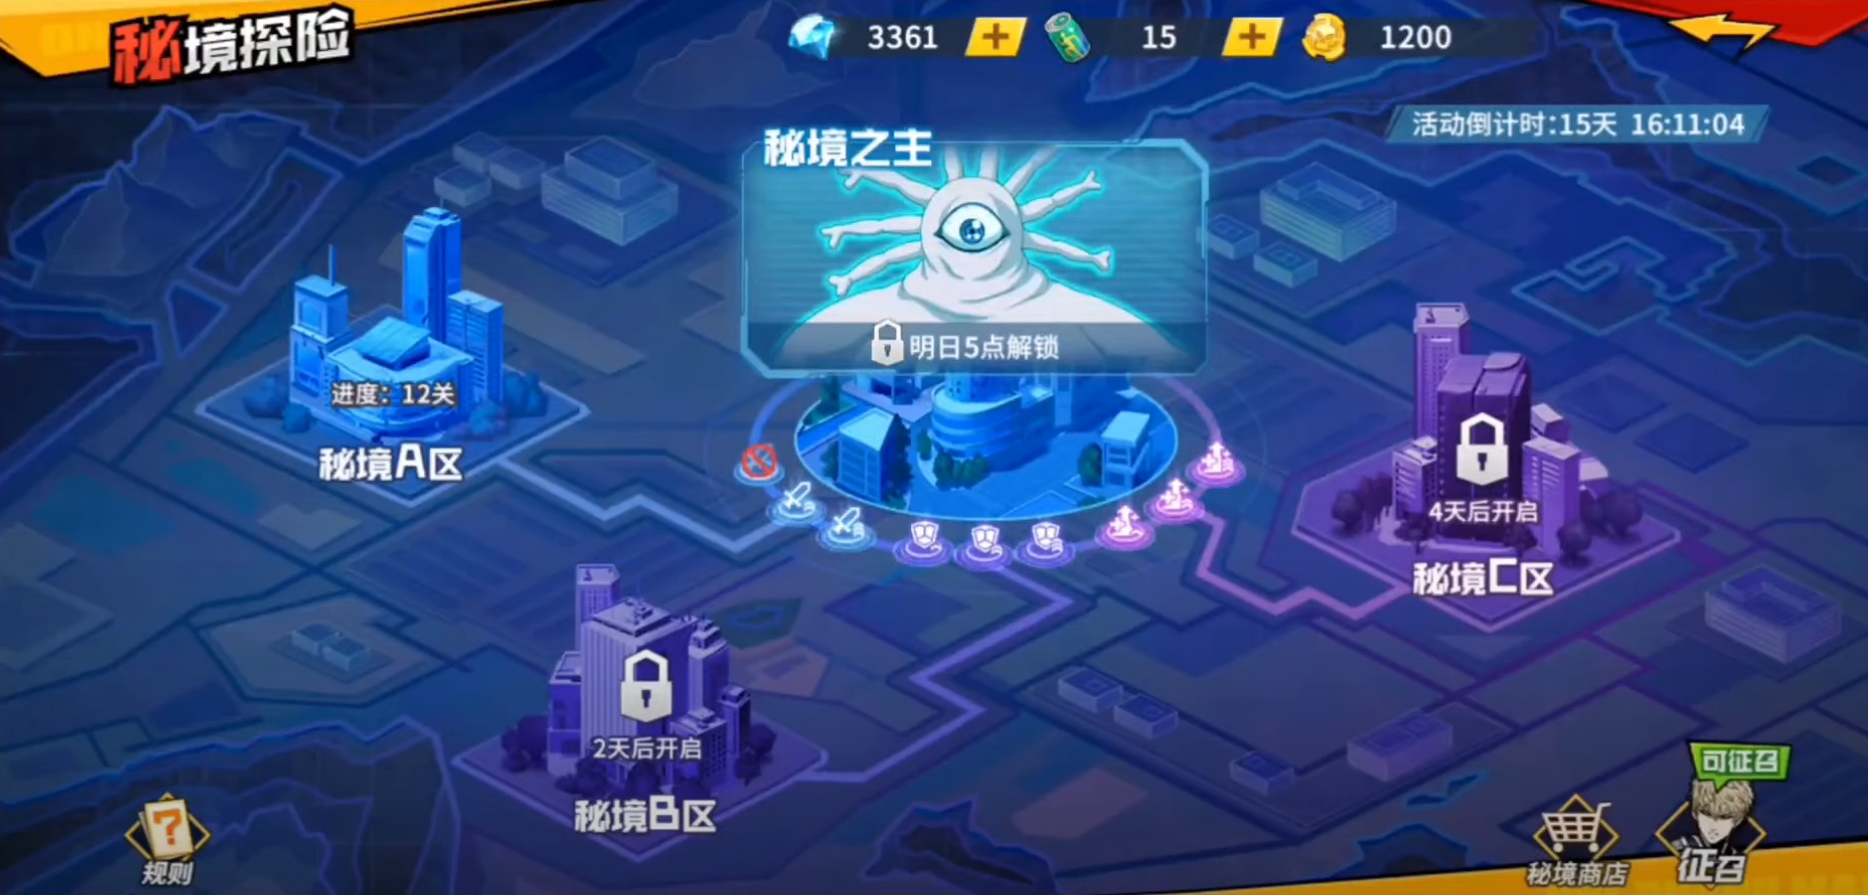
- Clear stages in the zones
- Each zone will have 30 stages
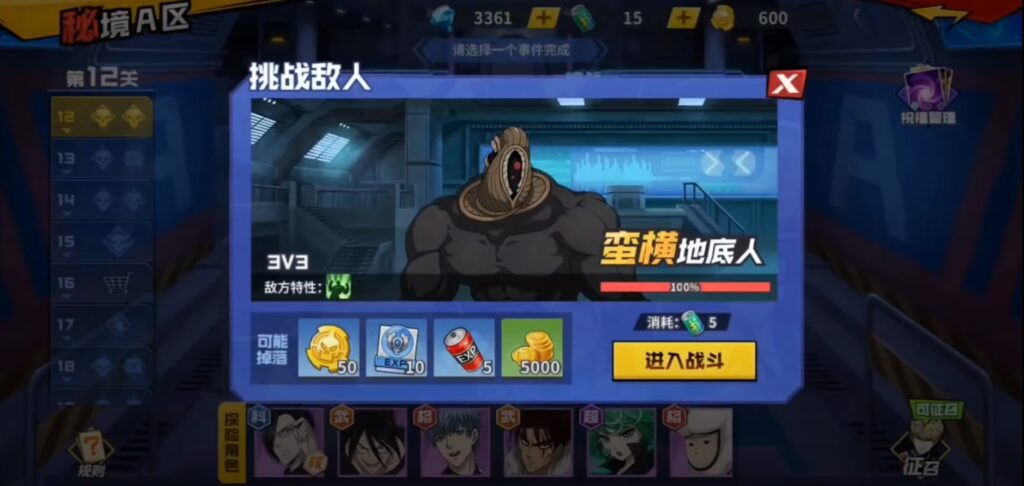
- Most basic stages will cost 5 energy to fight
- Some boss stages can cost 10-15 energy
- If you lose the fight, you lose the energy but the enemies HP stay at where they left off
- 60 energy is given for free daily (5AM reset), but you may buy more with gems 3x per day (100gems, 200gems, 300gems).
- Once you have completed the 30 stages, you can refresh the zone to fight again, costing 300 gems.
- The zones don’t open all at once, with A first, then B, then C, with 2 days interval in between. Boss is open on 2nd day.
- Each zone can be refreshed up to 5 times.
- Rewards*:
- Zone A: 3 SAC
- Zone B: Hero shards
- Zone C: Monster shards
- Recommended to refresh 5 times Zone A to get 3×5=15 SACs for 1500 gems.
- *depends on which release, initial CN and TW release was 3, but reduced to 1 in CN after.
- There are special stages which uses Forbidden coins to fight instead of energy.
- It doesn’t matter if you lose you can keep trying. It’s recommended to try because you will win back more coins than you spend if you win, including some nice rewards like SAC.

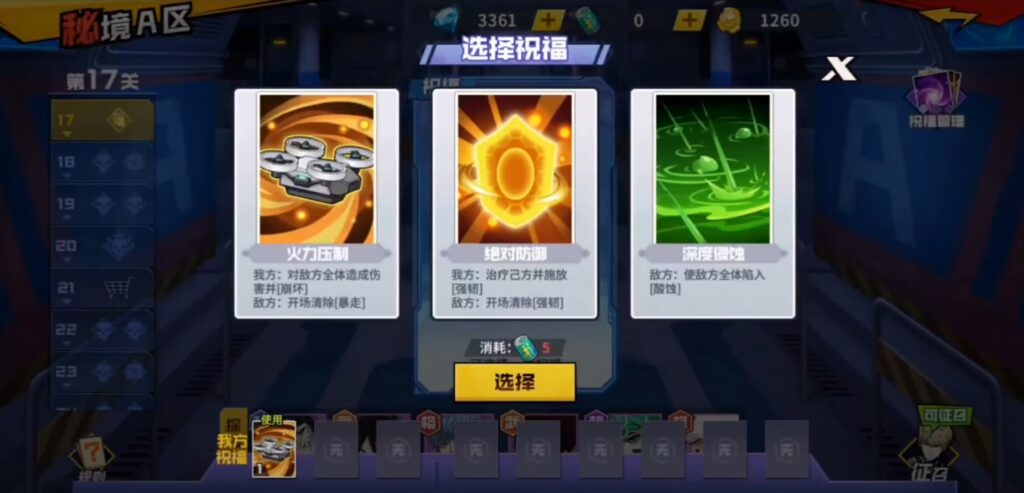
- As you progress, you will be able to select certain buffs/debuffs. This will require using energy, but you may use gems to buy if you run out of energy.
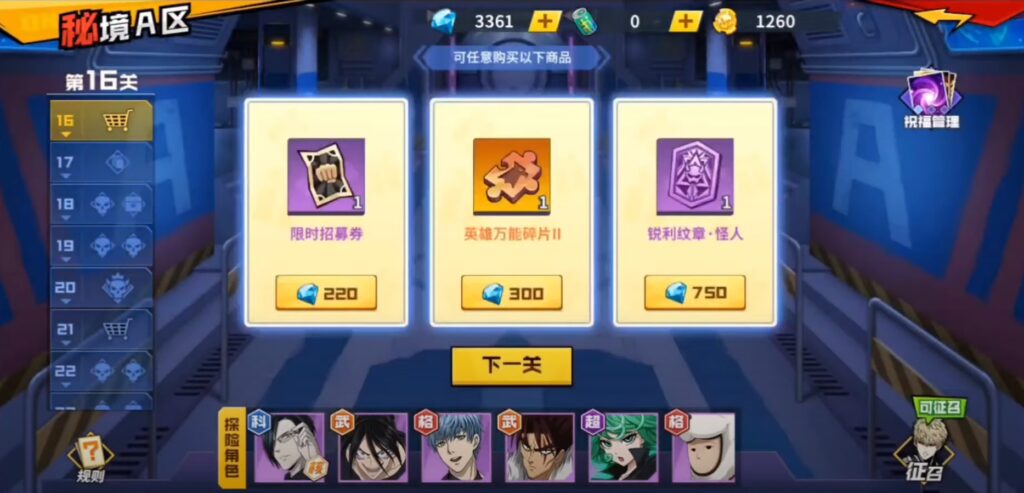
- There will be special rewards to purchase with gems once you pass through a certain stage in each zone (shopping basket icon).
- You can also just proceed to the next stage if you don’t wish to buy anything
- You can only buy ONE BT/BS for each zone, so it will become unavailable the second time you see it.
- 220 diamonds for each BT and ST. These are must buys.
- For other items like SAC or omnishards etc, it’s up to you and how much spare gems you have. I don’t think the 600gem for 2 SAC is worth.
- Boss stage – Clear the various stages in the Zones to weaken it (Stage 10, 20 and 30 of each zone). You can see the little icons under the boss round which represent the buffs, and they get negated once you clear zone stages.
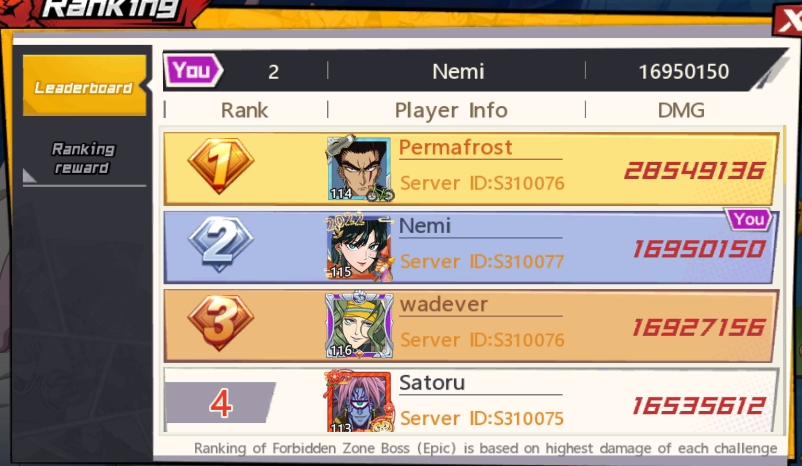
- Score will be based on how much damage you deal to insane stage big boss Gyoro.
- You can spend diamonds to increase berserk damage by 5% each time (cost 100 diamonds) (Inspire). This is essential to do if you want to hit the highest damage scores.
- There are 4 stages:
- Basic, Normal and Heroic
- Last stage (Epic) is just to get top score but you can’t kill the boss (higher damage = more rewards)
- There are specific unit bans in each season, eg for CN 1st release was SSR+MB and SSR+CE.
- There are great rewards for reaching damage thresholds; if you complete all the quests you get:
- 600gems
- SUP Sigil Box IV
- SUP Sigil Box V
- SUP Sigil Box VI x3 (this means a free lv7 sup sigil!!)
- and a bunch of other stuff
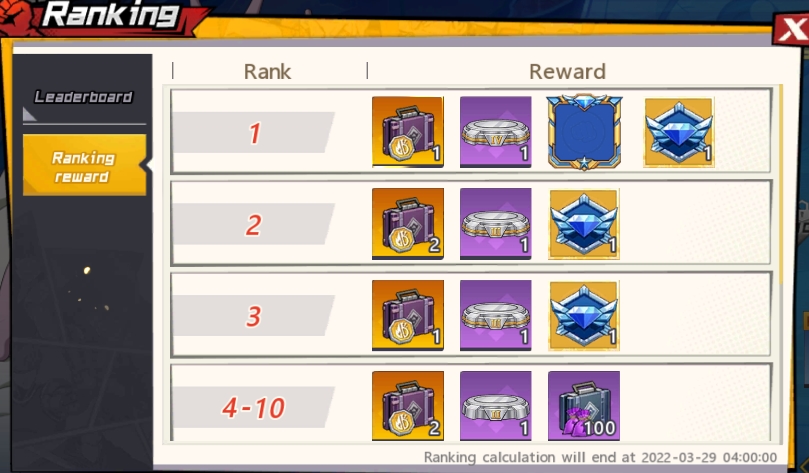
- Also in the competition stage, you will be awarded offensive selectable sigil.
- Rank 1 – DMG Sigil VII, Figurine Base IV, Strongest Avatar Frame, Strongest Badge
- Rank 2 – DMG Sigil VI x2, Figurine Base III, Strongest Badge
- Rank 3 – DMG Sigil VI, Figurine Base III, Strongest Badge
- Rank 4-10 – DMG Sigil V, Figurine Base II, Talent Chest III 100x
- Rank 11-50 – DMG Sigil V, Figurine Base II, Talent Chest III 50x
- Rank 51-200 – DMG Sigil IV x2, Figurine Base I, Talent Chest II 100x
- Rank 200 and below – DMG Sigil IV, Figurine Base I, Talent Chest II 50x

MALL REWARDS
- This is where you spend your Forbidden coins for more rewards
- There are 5 ‘floors’ in the mall, basically tiers with different rewards
- 1st floor – open by default
- 2nd floor – Clear Forbidden Zone Boss – Basic
- 3rd floor – Clear Forbidden Zone Boss – Normal
- 4th floor – Clear Forbidden Zone Boss – Heroic
- 5th floor – Obtain 200*10000 DMG in Forbidden Zone Boss – Epic
I recommend buying:
- SAC
- Omnishards
- Gold emblems
The rest depends on what you need!
TIPS
- It is recommended to save your recruitment chances, and use gems (50gems) to refresh the draft in order to make the best PVE team possible, with all +3 units.
- The top PVE units to aim for are (at the time of writing):
- Sonic V2
- ZBM
- Suiryu
- Gale Wind
- RMG
- SSR+ Boros
- SSR+ CK
- SSR+ MB
- SSR+ CE
- G4
- You’ll notice that the team is focused on mainly Follow-ups and Single target DPS, which is what you will need for the final boss stage (Gyoro).
- AOE/DoT team is not too bad overall for the zones, but you might not achieve a higher damage score at Gyoro
- According to J., ZBM core (even semi-activated) attains the highest score in CN compared to other core.
- The line-up is ZBM, Sonic v2, RMG, G4, Gale Wind and Suiryu.
- Suiryu same row as Sonic for shields for increased charge dmg
- You’ll need to use ZBM ult to heal once in a while when you get low from boss AOE
- Buffs you can use pretty much anything, but do get the one that removes Tenacity from boss (the one with stun).
- If you don’t happen to have the optimal units, you can click on the players on the leaderboard to see what line-ups they use, to get some ideas on what others are using
- Reset Zone A 5x at 300gems each for a total of 1500 gems, to get 3×5=15 SACs. (If the rewards have been reduced then DO NOT reset)
- It is recommended to use gems to Inspire for higher boss damage, at least to clear the PVE quest rewards to get the 3x SUP Sigil 6! If you have the optimal units at +3 each, then you should only need to inspire 15-20x depending.
- The inspire is just a flat rate to multiply your final damage. Eg if you inspire 15x, then your damage will just be x1.5. Hence you can easily count your damage required. So if you were already hitting about 7.5m without any inspire, then doing 20x inspire will give you 7.5 x2 = 15m final dmg, which is enough to get all the rewards.
- If you’re aiming for the top PVP rewards, then remember to constantly check the rankings towards the end. It will tally on the last day at 4AM – hardcore players can wait until the last moment maybe at like 330AM to inspire a lot and steal the top ranks (with a lot of inspiration) when majority of players will be asleep.
If you liked this article, do bookmark this site and follow our Twitter for more One Punch Man: The Strongest guides and updates like this! Join our Telegram group for faster updates!